Reproduced from https://sites.google.com/site/sbobovyc/writing/reverse-engineering/reversing-a-directx-game-part-1
DISCLAIMER: The information provided here is for educational purposes only.
Foreword
Over the last year I've been learning the art of reverse engineering games for modding purposes. It has been a fun process, but full of trial and error. I want to share my experiences here. The goal of this tutorial is to take you through the steps of reverse engineering game formats. Why is this useful? Most games these days don't support modding. For example, Jagged Alliance: Back in Action did not officially support modding, but I liked the game so much that I wanted to change that. The result was the JABIA Tools project, which included a myriad of tools including importer and exporter plugins for Blender.
Instead of showing you what I've done before, I decided to start a new reversing project for the purposes of this tutorial. I choose an obscure game, 9th Company: Roots of Terror. It is based on a Russian movie set during the Soviet-Afghan war. Why did I choose this game? I bought it, played the first few missions and uninstalled. This is a chance to recoup the $10 I spent. In addition, it has some nice low poly models.
This tutorial is aimed at intermediate users. I will not be explaining hexadecimal number representation, DirectX 9 or how 3D graphics work. These topics are very large and covered much better in other places. I am to help you build on top of your knowledge to learn how to do something that is not taught in a computer science curriculum. If you are not a technical person, but you enjoy video games and are interested in how they work, I encourage you to continue reading.
Reconnaissance
9th Company is developed by a Russian studio, Lesta Studio and uses the AdicoEngine2. Not much can be found online about this engine, but apparently there are some Russian modding tools. I spent a few moments trying to find them, but only found a few screenshots.
Gaphics debugging
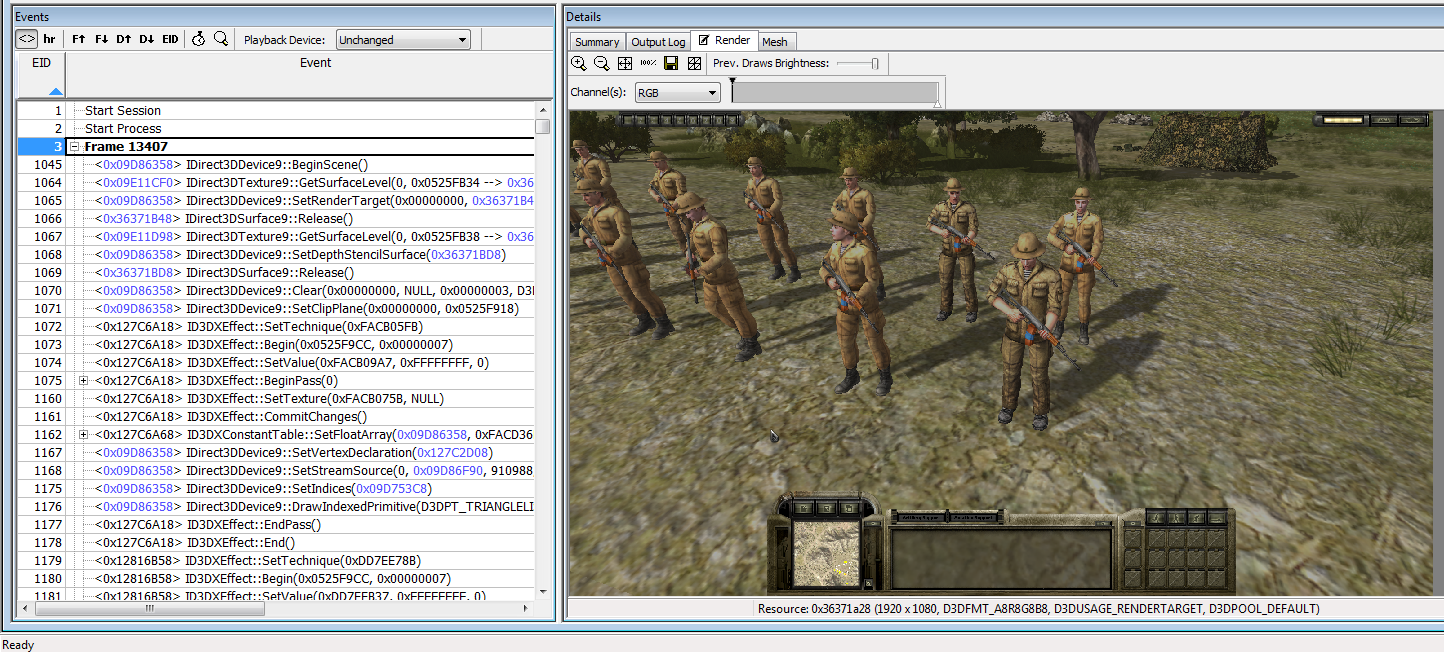
It was time to start up the tools and do some investigating. One of my favorite tools for this task is DirectX PIX. It comes with the DirectX 9 SDK and is used for profiling/debugging. It is also great for reversing. I started the game under PIX and did a single frame capture during the tutorial mission. Here you can see the the rendered frame.
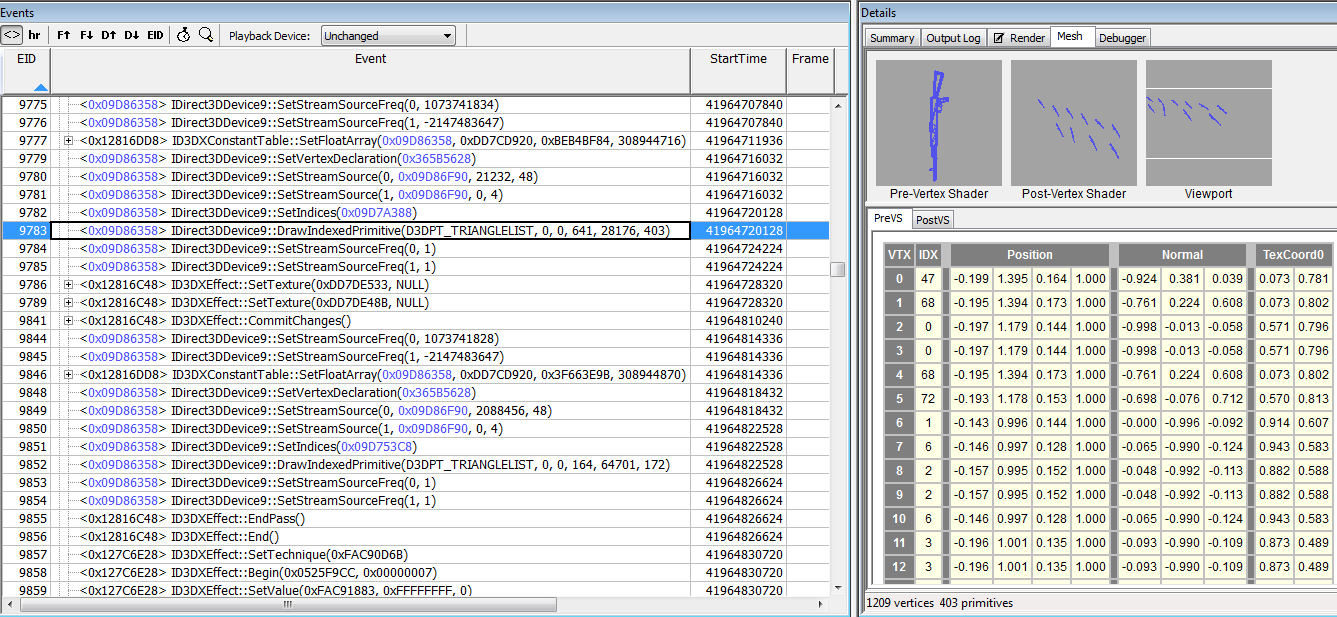
With PIX, you can debug an individual pixel. This will show you all the draw calls to that pixel. However, this game uses multiple render targets, so debugging a pixel will only show the calls for the last render target. I simply picked a draw call in the middle of the trace. From there, I debugged a pixel that was part of the AKS-74N. This led me to the draw call for this mesh. It is interesting to note that the engine uses a single draw call to draw all the instances of this mesh. You can tell that this is happening because there are multiple copies of the rifle in the post-vertex output. PIX tells us a treasure trove of information: faces, vertices, vertex positions, surface normals and UV texture coordinates. This information could be exported to a CSV file and turned into a 3D model

A few function calls before the draw, the vertex declaration is set. PIX prints it out really nice for us. This is an important piece of information that gives us a hint of how the game's custom 3D file format is structured.
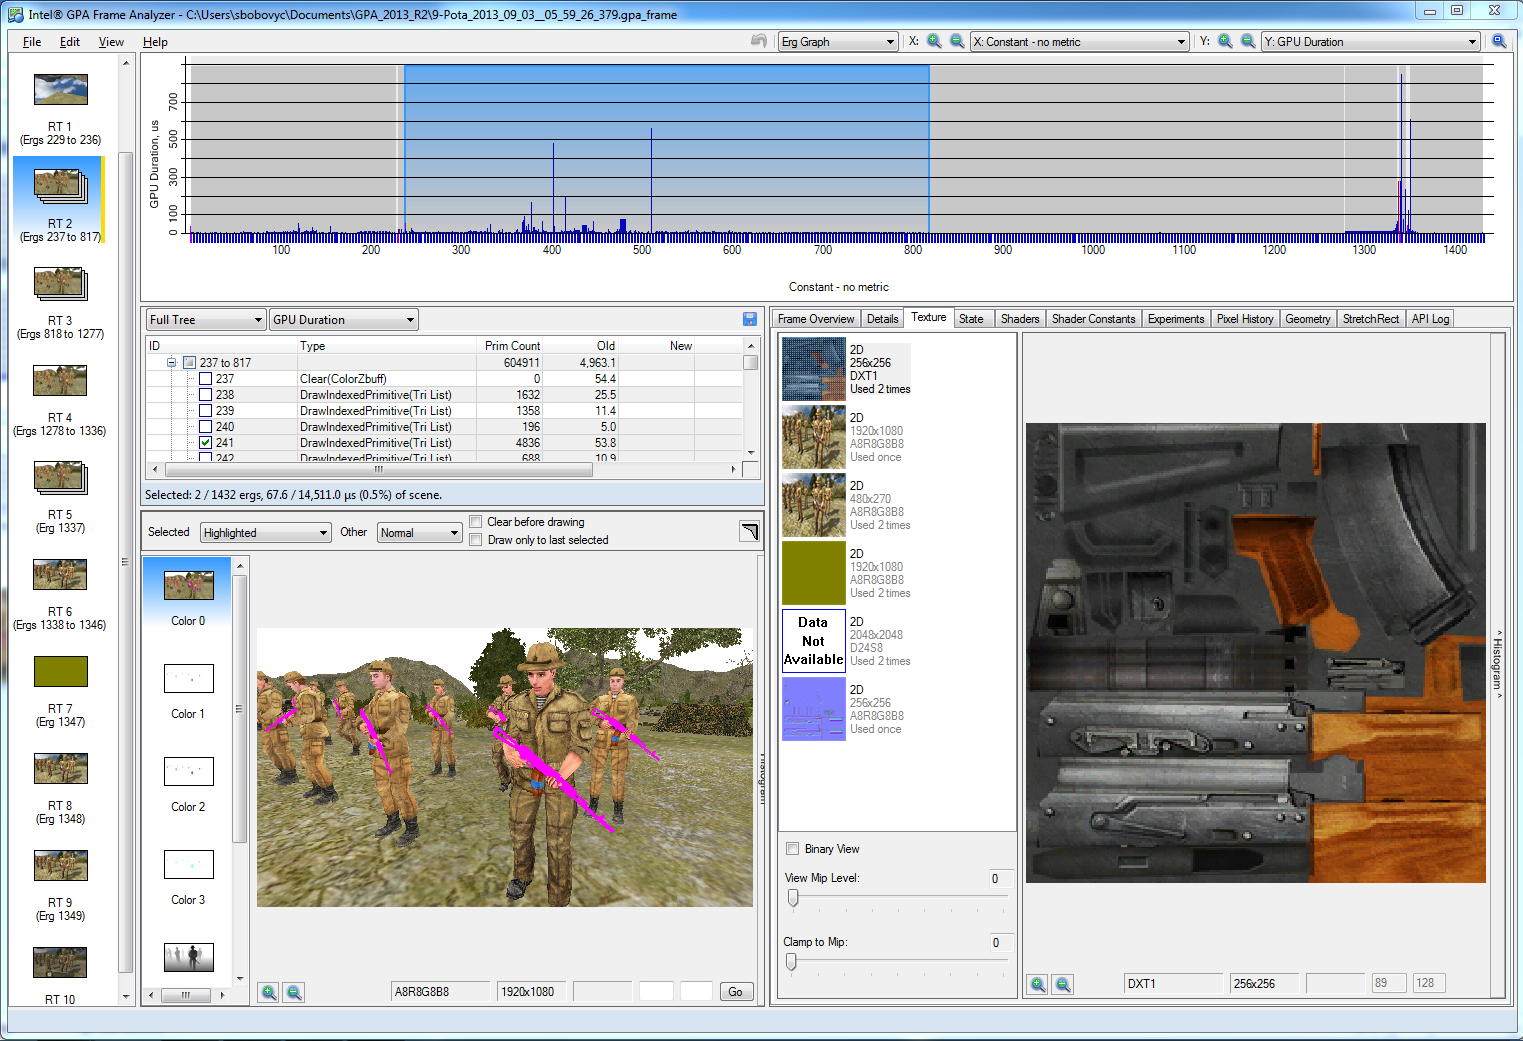
Getting the textures to the model is also pretty simple. PIX can do this, but in the interested of showing more tools I will show you how to do it with Intel GPA. Simply right click on the texture and save the texture as a DDS or PNG.
At this point, I could simply dump the mesh information and textures and be done with it. If all you care about is ripping a model, this is a way to do it. However, if you want to build modding tools, you have to pretty much fully reverse engineer the 3D file format. In the next tutorial I will show you how to dump the mesh geometry with PIX and import it into Blender.
Conclusion
The code for this work can be found here https://github.com/sbobovyc/GameTools/tree/master/9rota