Reproduced from https://sites.google.com/site/sbobovyc/writing/reverse-engineering/reversing-a-directx-game-part-20
DISCLAIMER: The information provided here is for educational purposes only.
Foreword
In the last tutorial, I showed you how to get at the geometry information of a scene using PIX. This tutorial will show you how to dump this geometry information and import it into Blender.
Dumping geometry
I did not have a Blender script ready when I first started this process, so I choose to dump a simple object in order to simplify my debugging steps. Clicking on a draw command and clicking on the mesh tab will show the geometry information, as shown in the previous tutorial. Right clicking on the geometry info will bring up an option to export the current geometry to a CSV file. The pre-Vertex shader CSV dump of a simple object like a hat looks like this:
VTX,IDX,Position[0],Position[1],Position[2],Position[3],Normal[0],Normal[1],Normal[2],TexCoord0[0],TexCoord0[1]
0,0,-0.044,1.747,0.114,1.000,0.643,-0.173,-0.746,0.637,0.335
1,45,0.005,1.743,0.129,1.000,-0.035,-0.010,-0.999,0.652,0.335
2,1,-0.032,1.792,0.117,1.000,0.460,-0.546,-0.700,0.642,0.322
3,1,-0.032,1.792,0.117,1.000,0.460,-0.546,-0.700,0.642,0.322
4,45,0.005,1.743,0.129,1.000,-0.035,-0.010,-0.999,0.652,0.335
5,23,0.005,1.788,0.128,1.000,-0.027,-0.439,-0.898,0.649,0.323
...
etc
PIX tells us that the format of this list is three vertices per primitive.
Importing into Blender
It is a simple matter of writing a python script to import this CSV into Blender. The full script can be found here. I will not explain the script in detail since the code is straight forward. I will explain the basic process and a few caveats. The first thing I did was import the geometry. This consists of the vertex indices and their XYZ positions. Once that was done, I imported the texture (UV) coordinates. After debugging those, I imported the normals.
The first is that DirectX and Blender use different coordinate systems. DirectX uses a left handed system with the Y axis being up. Blender uses a right handed system with the Z axis being up. The importer script takes care of this conversion. When importing the object, each triangle had its own set of vertices. That is, vertices were not shared between faces of the mesh.
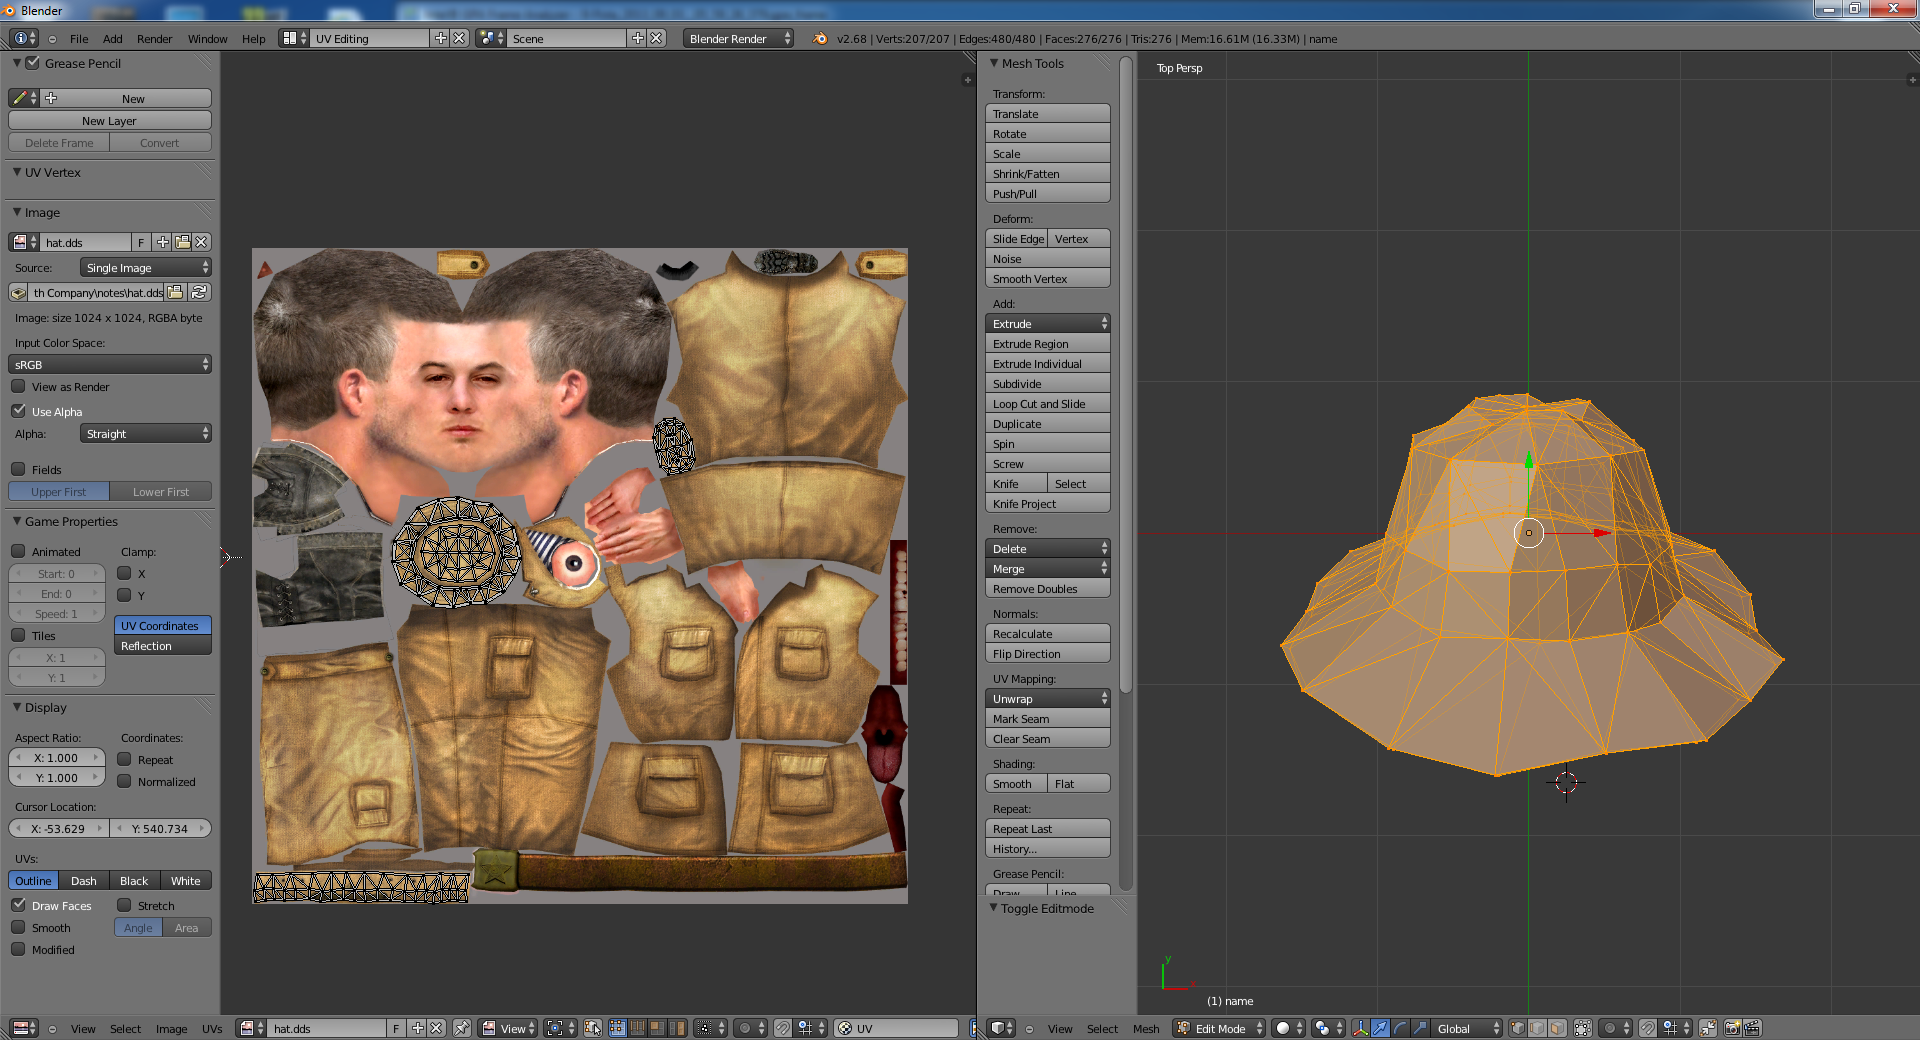
As you can see in the following image, the V component is wrong because the UV map does not line up correctly with the texture.
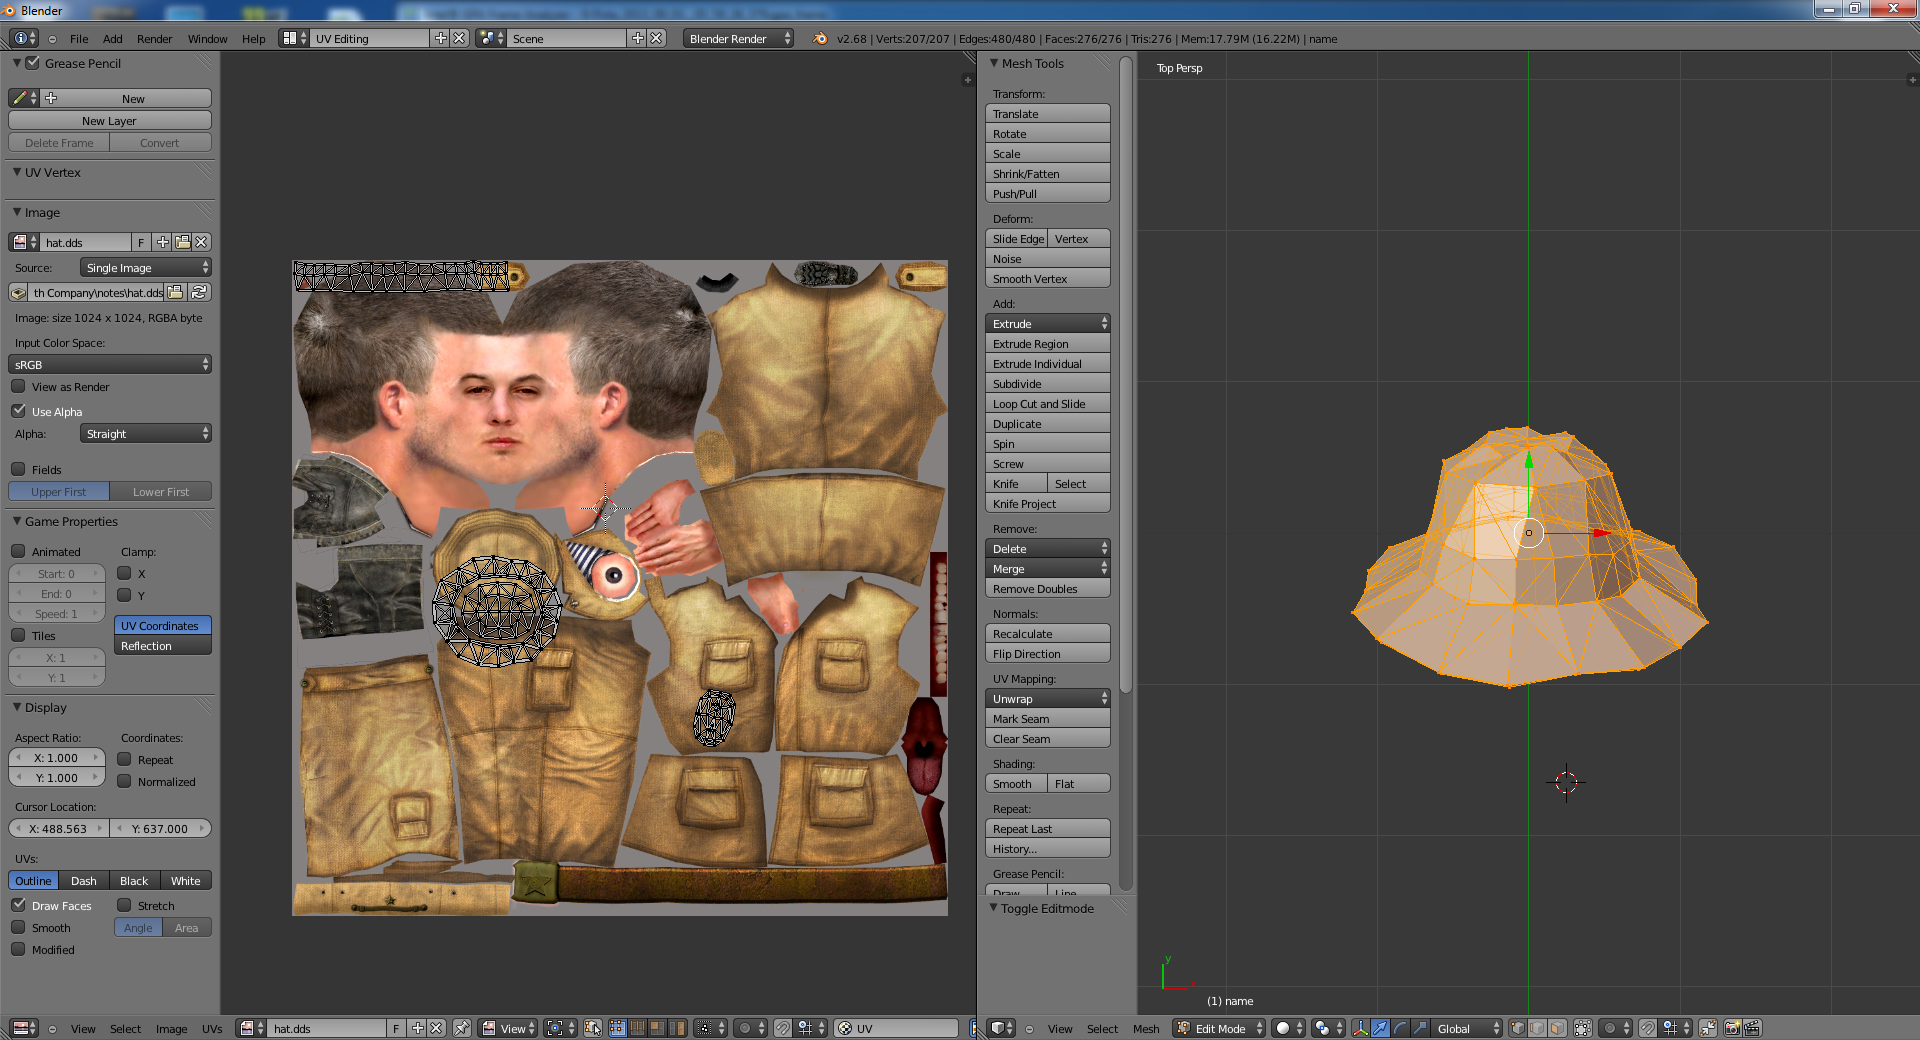
To fix this, simply subtract the V of each vertex from 1. Now the UV map is correct.
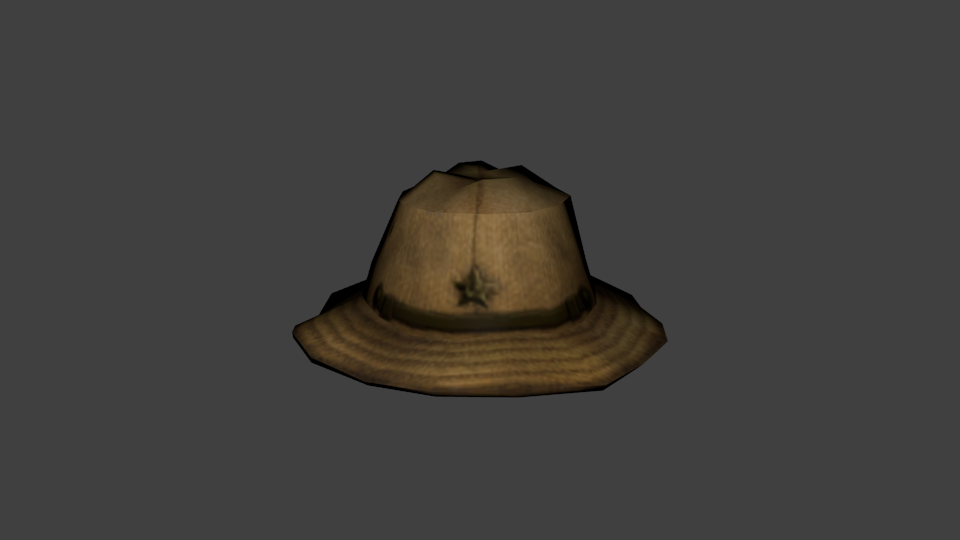
Here is the render of the hat.
Another thing to watch out for is how normals are oriented. Taking the normals straight from PIX, they are wrong:
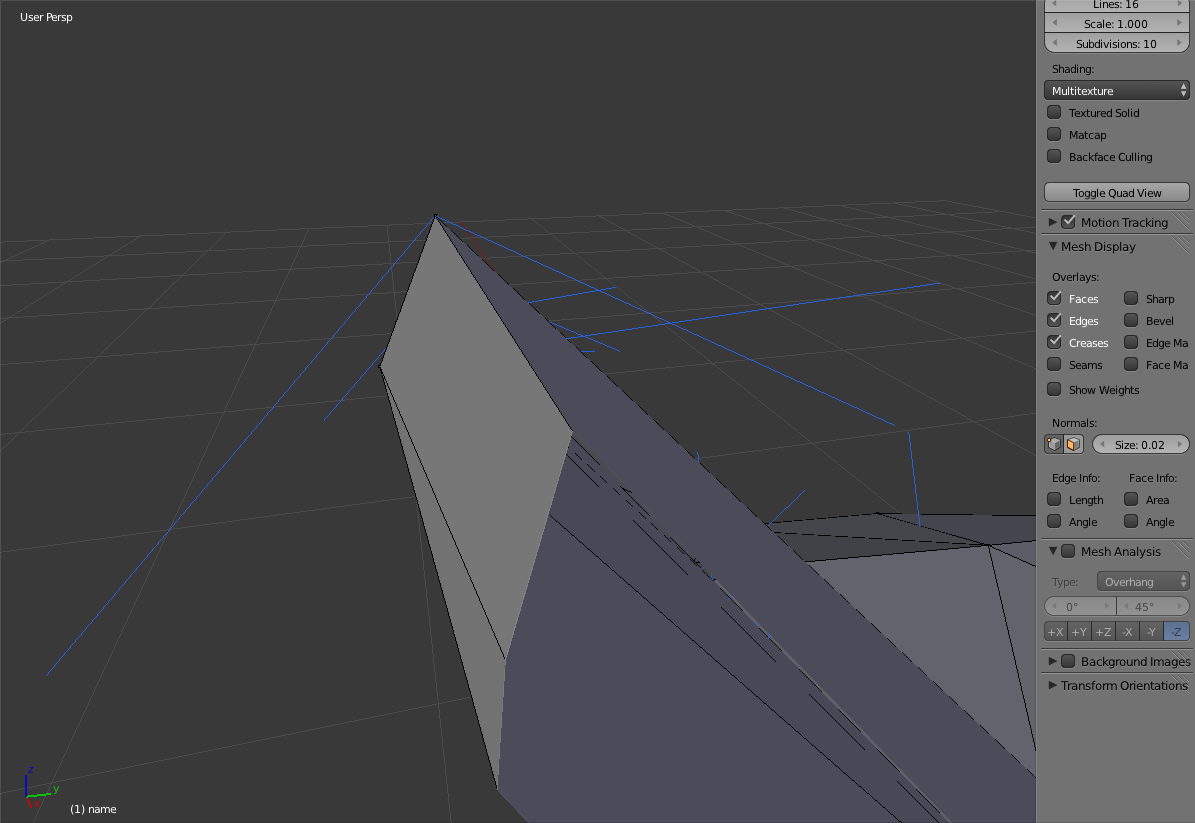
DirectX traverses vertices in clockwise order while Blender does it in counter-clockwise order. This differences causes the normal to point the wrong way. The provided script takes care of vertex reordering by default.
After importing unsymmetrical meshes, it was clear that they where mirrored across the x axis. The mirroring is fixed by negating the x coordinate in each vertex.
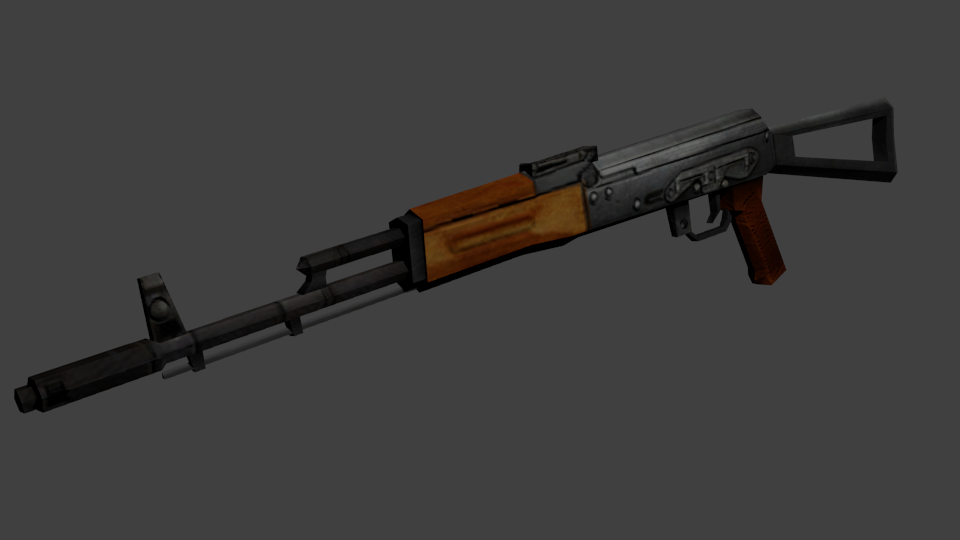
Here you can see a correct render AKS-74N. This render includes both the diffuse texture and normal map.
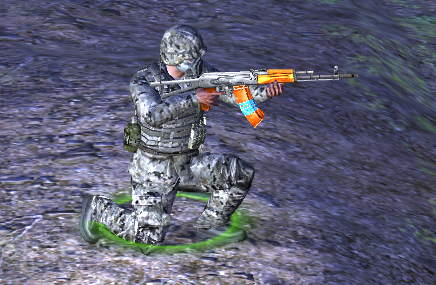
Once I have the mesh and the textures, it is pretty simple to port them to another game. Here is the same AKS-74N that has been port to Jagged Alliance: Back in Action:
Conclusion
There some problems with this process. PIX rounds all the floating point numbers to the 3rd decimal place. Another problem is that the material properties are not preserved. Finally, this process is on directional. To be able to export your own meshes so that they are usable by the game, the 3D format has to be reverse engineered. In the next tutorial, I will show you how I reverse engineer the packing format used by this game to get at the 3D and texture files.